Consolidated Payments

Written by: Categories: Features
February 5th, 2015

Simplify Your Renewals

We’ve simplified renewing your account with us. Prior to this, you would have different features expiring on different dates? Our new billing consolidation feature allows each feature to be merged and renewed on a single date.

.2015-01-15_15-37-19

2015-01-15_15-41-19


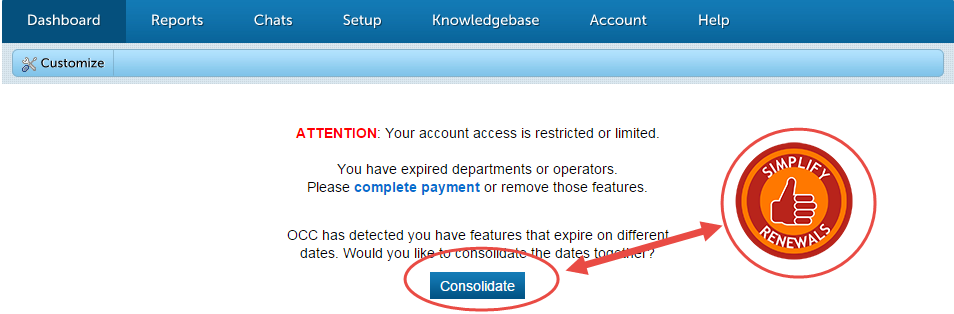
Getting set up is easy. If your account is eligible, you should receive a notification when logging into your Account Dashboard with a red button that reads “Simplify Renewals”.

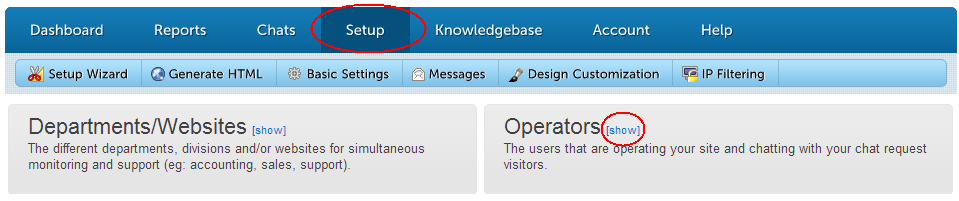
Alternatively, navigate to the “Account” section to manage your account features and view their respective renewal dates. There are a couple scenarios where you will not have this option available even though you have multiple features with different expiration dates.

Those are:

  • If you are on monthly billing and you have features expiring greater than 30 days from each other. For example, you are on monthly billing and have FeatureA expiring on 3/1/2015 and FeatureB expiring on 4/18/2015. Switching to Annual Payments WILL allow you to consolidate your features to one date. Otherwise, you can renew FeatureA regularly, then consolidate your features at the time of renewal of FeatureB.
  • If you are on Annual Payments and have one or more features expiring past 365 days. Meaning, you renewed a feature for 1 year before it expired, and now have features that are not expiring within 365 days of each other. If this is the case, you will need to wait until you are within the 365 day renewal window to consolidate your features.

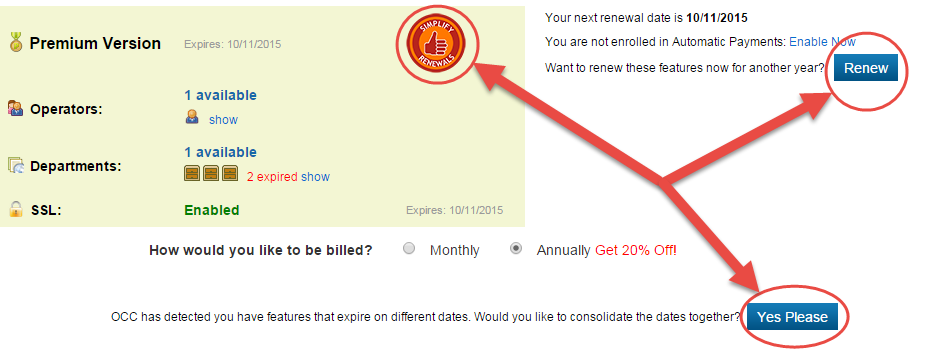
After clicking the Simplify Renewals button, you will proceed to the consolidation page which will contain the amount of credit you will receive and the new expiration date of your subscription.


2015-01-19_14-54-58


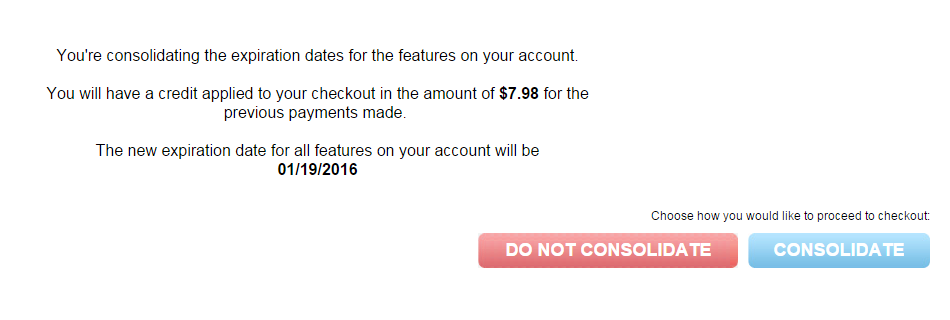
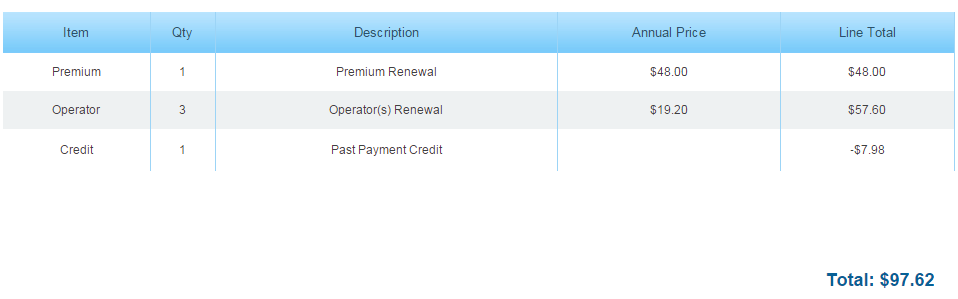
When you click “Consolidate” you will then proceed to the checkout page, which will list your features to be consolidated and any prorated credits added to your account.


2015-01-19_14-56-10


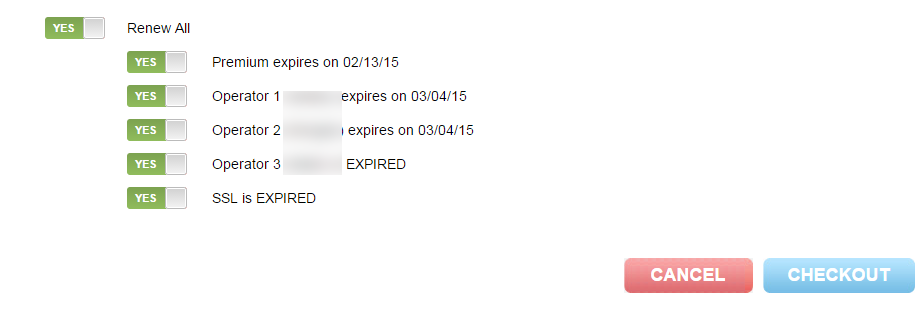
Regardless if you are consolidating your account or not, everyone will see that we have made some visual changes to the feature renewal page.

Features can now be toggled on or off, making it easier to enable or disable features on your account.


2015-01-19_15-06-52


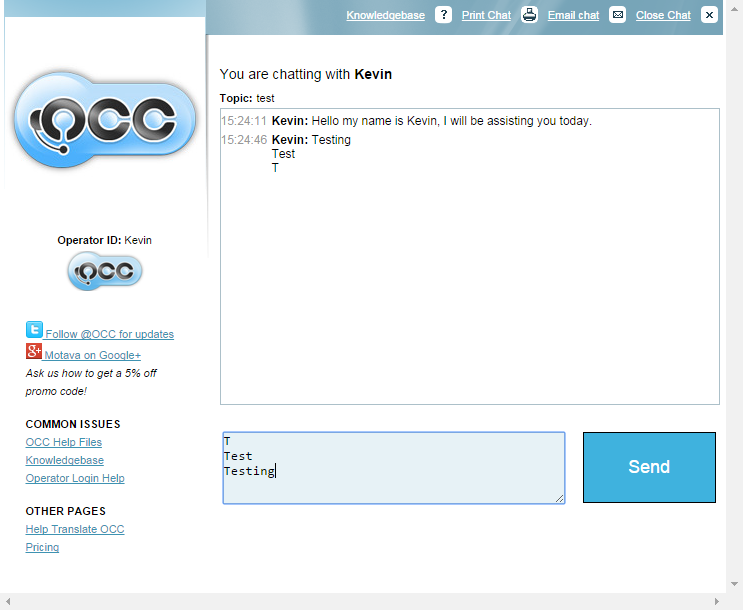
We hope this simplifies things for you all; let us know by opening a live chat with us!

Updates to Chat Forwarding

Written by: Categories: Features
December 8th, 2014

Chat Forwarding Revamped


2014-12-03_11-22-17

You will now only be able to forward chats to associated departments.

Why are we making this change? We believe that this will help our customers with multiple departments that have no affiliation with each other.

Example if Person A has 3 departments 2 (d1, d2) are for one website and the last one (x3) is for a different website. d1 and d2 would be associated with each other so they can forward chats to each other, but unable to forward to x3.

To associate departments together you go to Account Dashboard > Setup > Departments and click the Edit in the right column.


2014-12-08_11-50-01

You now are able to forward chats to entire departments and not just individuals.

Chat Stats – New Reporting Feature

Written by: Categories: Features
November 12th, 2014

New Reporting – Chat Stats

Is your Chat supposed to be online 24/7?

Are your employee always on break?

Our new Chat Stats report will show you dead spots throughout the day and when your employee takes their breaks and lunches. This feature is available for Premium and Enterprise Users only.

2014-11-12_12-49-20

You will now be able to see the times your operator’s statuses and when your chat is online, offline, hidden or idle.

  • Green is Online status
  • Yellow is Online (idle) Status
  • Blue is Hidden (offline) status
  • Red is Offline status


2014-11-12_14-44-092014-11-12_14-46-02


Department chat stats are slightly different, showing only green and red for online and offline. Green will be shown if at least 1 operator is Online or Idle.


2014-11-12_12-53-36

If you hover your mouse over a segment of the report, you will see the duration of the segmented area. Example using the screen shot above Kevin was online for 2 hrs and 31 mins between 10:34 am-1:05 pm.


New Email/CSV Reporting Features

Written by: Categories: Features
October 28th, 2014

We’ve released some new features that were requested by our users:

  1. Email/Export CSV customization
  2. Response Time for chat history
  3. Missed Request/Offline Messages customization and date range


2014-10-28_13-21-04


Now you will be able to choose which columns will be sent to your email or will be found in your CSV export. You will now also be able to see how long it takes for your operator to respond to each chat, with the new field “Response Time”

The CSV export can be used for organization or importing into your CRM.


2014-10-28_13-20-17 2014-10-28_13-19-43


In your Account Dashboard > Chats > Offline/Missed you will now be able to have the same customization as your chat history. We have added a date range and the same email/CSV options included with your chat history.

Knowledgebase Hyperlink Guide

Written by: Categories: Community
October 10th, 2014

We recommend doing this for each of your knowledgebase articles. If you choose to not setup your links this way, your links may behave unexpectedly.

kb 1kb 2

1. For new links, highlight your text and click the “Insert/Edit Link” button or you can right-click an existing hyperlink and click “Edit Link”

kb 3


2. Next you will enter the URL that you wish to link to

kb 4


3. You will now want to change the target to New Window (_blank). This will open the KB article in a new window.

OCC Agent Update Windows/Mac – Insert Line & Small Fixes

Written by: Categories: News
October 6th, 2014


Please update your OCC Agent if you have not already (version 2.0.59.0), we have few minor bug fixes. www.onlinechatcenters.com/occ-agents

2014-10-01_15-25-19 2014-10-01_15-31-56


Visitor View Operator/Agent View

You may now use “CTRL/CMD + ENTER or Shift + ENTER” in the OCC Agent to insert a new line into the chat.


Other Bug Fixes

  • Added white spacing between lines in chat messages to be more unified.
  • Fixed KB articles format (font size, style, line breaks height), when placed in chat.
  • Found and fixed a bug when KB articles open from the OCC Agent and is associated with > 1 departments.

New Features – Force Offline and Chat Distribution

Written by: Categories: Uncategorized
August 22nd, 2014

We have just release new features for our Premium/Enterprise users which you can find in your Account Dashboard

Force Offline

Offline setting

You can find the setting for the Force Offline feature in the Account Dashboard > Setup > Offline Settings. After you have located the Force Offline settings you click +Add more hours to add the date and time you wish to be offline.

dayshours


In this menu you just select the days and time you wish to be offline. For the time you format either with 12 hour clock (2:00 pm) format 24 hour clock format (14:00). The setting time setting will not roll over so make sure if you wish to be online between 9:00 am and 5:00 pm, you will make 2 different entries (12:00 am- 9:00 am and 5:00 pm to 11:59 pm).


Chat Distribution

chat dintervals


With this setting allows you to define how chats reach your operators.

  1. All Operators- This is the default setting for users when a visitor imitates a chat it will ring all operators
  2. Status- It will ring Online (Green) operators first, then Idle (Yellow) and finally Hidden (Blue).
  3. Avoid Concurrent- It will ring operators based on the amount of calls they are currently in (least to most).
  4. Equalize- It will ring operators with the least amount of chats in the last 30 days.
  5. Round Robin- it will ring operators in order.

The time it takes to ring the next operator is based on the time you choose for the intervals.


OCC Agent Update – Windows

Written by: Categories: Features,News
July 29th, 2014

We have just released a new OCC Agent for Windows!

What’s New

The new update includes the following new features:

1. Desktop Notifications

2. New icons within the application

3. Minor bug fixes

Desktop Notifications

Windows based customers will begin seeing notifications in the lower-right corner of their screens indicating new chat requests and visitor chat responses.

Without having to switch over to the OCC application, you’ll be able to preview chat requests before Accepting/Rejecting (or ignoring) directly from these notification windows. As well, you will be able to see visitor responses while in chat sessions with them.

desktop-alert2


As usual, these notifications are optional and customizable from within your desktop application.

desktop-alert1

New Icons within the application

Rather than just features we decided to put some time into pretty-ing up the application a bit. You’ll notice a few visual updates with this new version.
Here’s some of the new icons you’ll find:

updated-icons

Minor bug fixes

Improved proxy support.

—
Download it now here: OCC Agent
—

Android App Beta Available

Written by: Categories: Uncategorized
June 27th, 2014

Attention: Our Android App is currently still in Beta but we are offering it to all our users for free to test and give it a spin.

So, first thing you will need to do is:

Step 1: Go to Settings on your Android Phone and tap on Security

Step 2: Make sure “Unknown Sources” is checked

Step 3: Use this link on your phone to download and install.

Thank you and hope you enjoy the app.

Dashboard User Rights

Written by: Categories: Uncategorized
June 27th, 2014

You requested it…We’ve delivered it!

We are pleased to now offer the ability for the Admin of the OCC Account to assign certain user rights to each operator within the account.

This is primarily useful for Canned Messages, Knowledge-base Articles, etc.

Simply login to your Account Dashboard, proceed to Setup–>Operators and at the bottom you will see Dashboard Access with a checkbox.

Dashboard-setup-operators

Click that and you will have every Dashboard feature as a checkbox for enabling access to that selected operator.

Dashboard-Access

*BE SURE TO CLICK SAVE AT THE BOTTOM OF THE LIST.