


Setup Wizard
The Setup Wizard will walk you through the basics of setting up the OCC account.
You can also skip the Setup Wizard and manage your account through the other menu options under the Setup menu. The Setup Wizard can be run at any time via Setup > Setup Wizard within the Account Dashboard.
Step 1: Company Logo
![]()
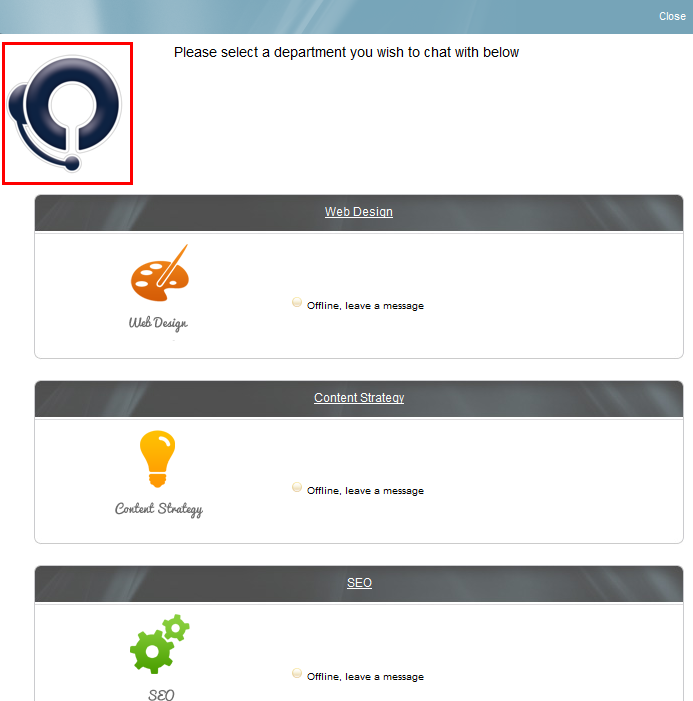
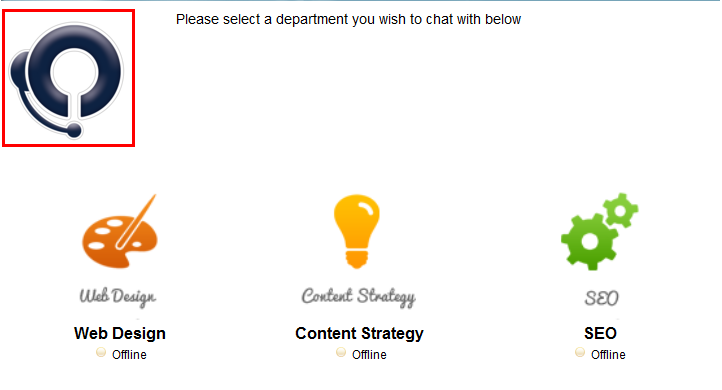
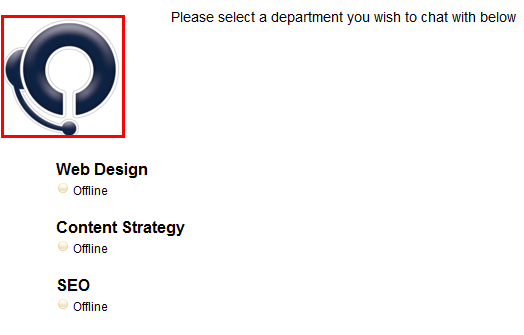
Your company logo is used on the department selection page of the chat window. You may also leave this blank. Examples of department selection pages are shown below with the company icon outlined in red.
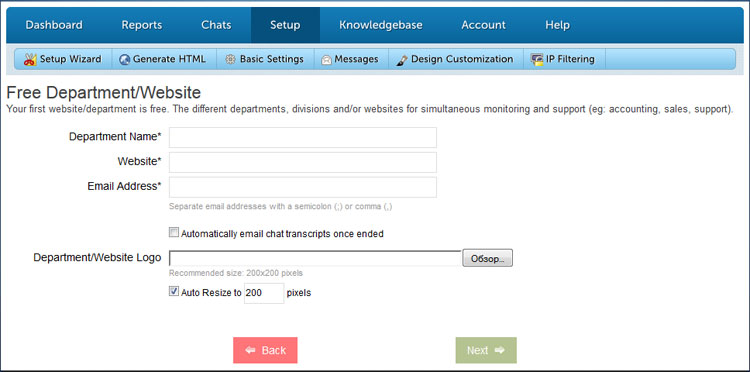
Step 2: Departments/Websites
Within OCC, you can create different departments. Departments are created primarily as divisions for operator-specific assignment but each department can be customized with completely different settings, including look, language and more. Each account gets 1 free department.
For example, departments can be created for Accounting, Sales and Customer Service with specialized operators assigned to each department. Supervisor level operators can be assigned to all departments to monitor all requests.
Another way departments are used is to monitor multiple websites, just create a department for each website and you will be able to monitor each website via the OCC Agent.
Finally, departments are also popular for multi-language websites as all the windows can be customized for each particular language.
A few important items to note:
The email address entered for the department will be where the offline emails for this department will go to. Chat history archiving is set to 30 days for Free Accounts. Premium and Enterprise Accounts have no chat history archiving limit. Once a paid package expires, history is saved for an additional 30 days.
Step 3: Operators
Operators are the ones that use the OCC Agents to monitor visitors to your website(s) and chat with visitors that request chats. You can assign the operator to multiple departments or just select departments. Operators will only be able to see visitors and chat through the departments they are assigned to!
Step 4: Online/Offline Icons
Online and Offline Icons are the graphics that are displayed on your website in accordance with your operators’ statuses.
You may choose from the OCC library of icons or use your own custom icons. Icons can be customized per department/website.
![]()
Step 5: Wrapping Up
Now you will see an overview of all your settings and the snippet of HTML to add OCC to your site. If you need to edit something, you may select to go Back.
Add the snippet of HTML on any pages you would like the OCC online/offline icons to appear.
If you added additional features during your Setup process, you’ll be forwarded to the Account page for payment.
You will have a 10 day trial from the time you sign up to try all features you have added.
You can always find the HTML for your website in your Account Dashboard under Setup > Generate HTML.